Tagged with 'recipe'

Recipe: Giant Double Chocolate Dark Raspberry Truffle Cookies

We all know that Sweet Shoppe Melting Wafers are perfect for dipping, drizzling, & coating, but did you know they can also replace chocolate chips or chunks in your favorite baked goods?


Brittany from Sugar Cove Sweets took things up a notch with these Giant Double Chocolate Dark Raspberry Truffle Cookies, featuring our Sweet Shoppe Dark Raspberry Truffle Flavored Melting Wafers for a rich, fruity twist on a classic chocolate cookie. 


These cookies are thick, fudgy, & packed with chocolatey goodness with bits of melty Dark Raspberry Truffle Wafers in every bite. Whether you're a home baker or a professional baker, this recipe is a must try!
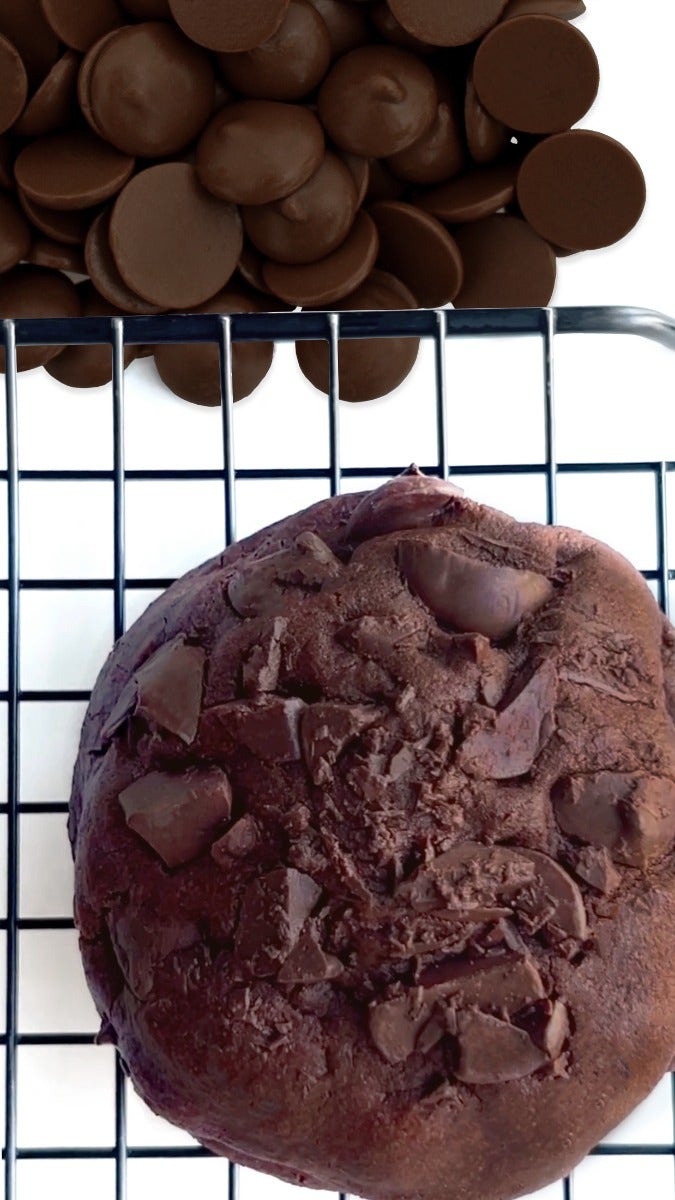
 

Giant Double Chocolate Dark Raspberry Truffle Cookies


Ingredients:


 Instructions:

  1. Preheat your oven to 400°F.
  2. Chop 1 cup of Sweet Shoppe Dark Raspberry Truffle Flavored Melting Wafers & set aside.
  3.  In a separate bowl, whisk together flour, cocoa powder, cornstarch, baking soda, & salt.
  4. In a stand mixer fitted with a paddle attachment, mix butter on high for 1 minute. Scrape sides, then mix again for 30 seconds.
  5. Add brown sugar & granulated sugar to the butter & mix on medium until fluffy.
  6.  Add vanilla extract, egg, & egg yolk. Mix until just combined (don’t overmix!).
  7.  Gradually add the flour mixture on low speed until fully incorporated.
  8. Fold in 1 cup chopped Dark Raspberry Truffle Melting Wafers.
  9. Roll cookie dough into balls & dip the tops in additional chopped wafers before placing them on a baking sheet.
  10. Bake on the middle rack for 10-12 minutes, depending on cookie size.
  11. Let cookies sit for 10-15 minutes after baking before transferring to a cooling rack.

Why Use Sweet Shoppe Melting Wafers Instead of Chocolate Chips?

Unlike traditional chocolate chips, our flavored melting wafers bring extra depth to your baked goods! These Sweet Shoppe Dark Raspberry Truffle Flavored Melting Wafers add a luxurious berry-infused dark chocolate flavor, creating a gourmet cookie experience without the hassle!

Whether in cookies, brownies, or even muffins, these wafers melt beautifully & deliver consistent, bold flavors in every bite!

Try this decadent double chocolate cookie recipe & let us know how it turns out! Share your photos & baking experiences in our Stover’s Confection Connection Facebook group—we can’t wait to see your delicious creations!

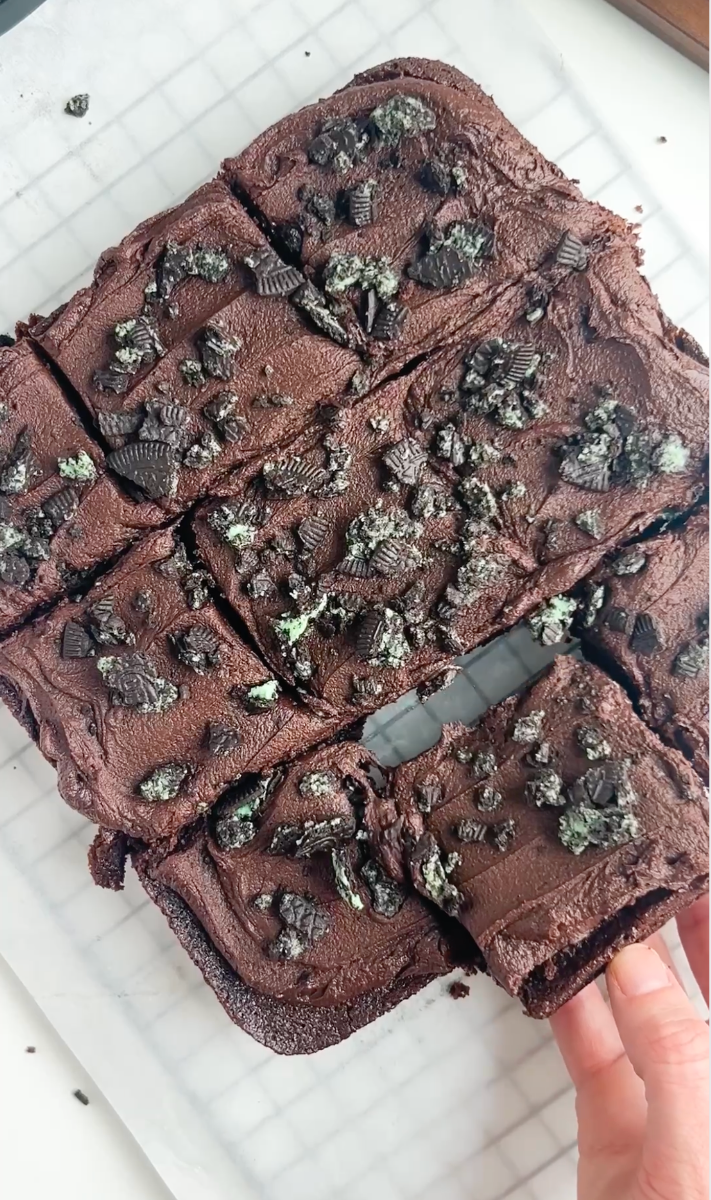
 

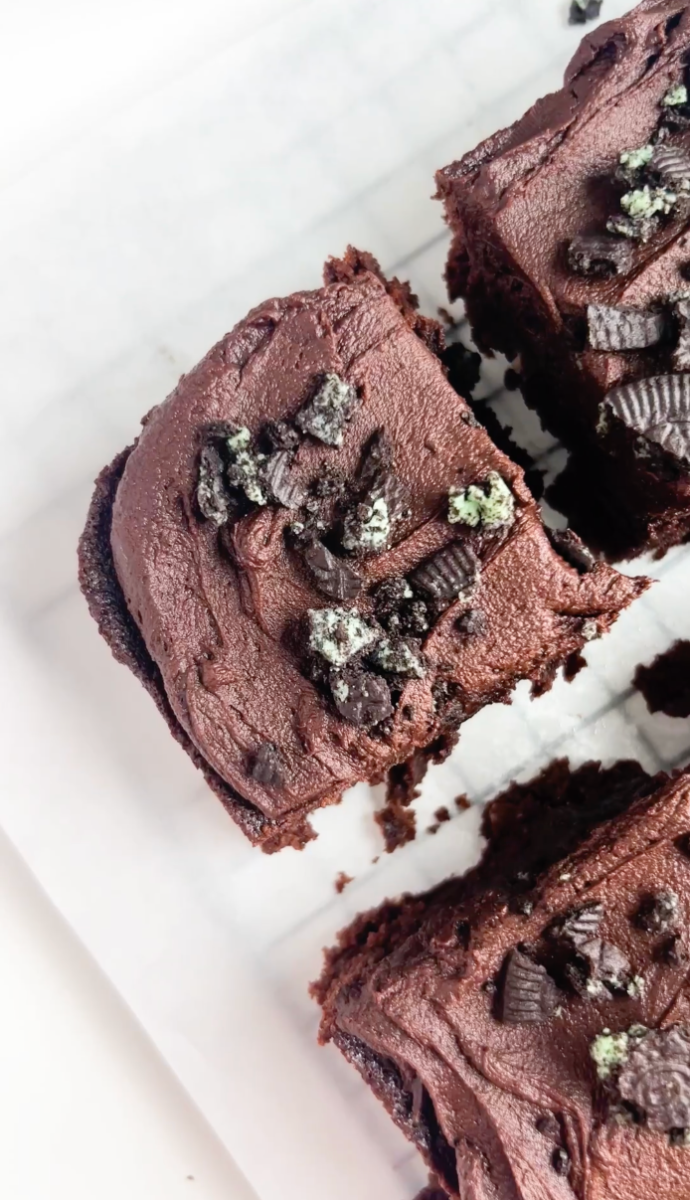
Brownies with Midnight Mint Chocolate Flavored Frosting


Elevate your brownie game by topping them with a creamy, mint-chocolatey frosting! Made with our Sweet Shoppe Midnight Mint Melting Wafers, this frosting blends the deep richness of cocoa flavor with a refreshing hint of mint, creating a flavor combination that is irresistible. 

Ingredients:

Directions:

  1. Combine the melted butter & cocoa powder in a medium-sized bowl using a hand mixer until well blended.
  2. Gradually add the powdered sugar & salt, mixing with the hand mixer on low. Add tablespoons of milk or heavy cream in between to achieve a smooth consistency.
  3. Once the mixture is smooth, add the melted Sweet Shoppe Midnight Mint Melting Wafers.
  4. Mix on medium to medium-high speed until the frosting is fully combined & velvety.
  5. Spread the frosting generously over cooled brownies. For an extra touch, sprinkle crushed mint Oreos on top. Enjoy!

So, what are you waiting for? Grab your ingredients & followalong with  this video to start baking your way to Midnight Mint Chocolate Flavored Brownies!  Don’t forget to share your creations with us on social media – we’d love to see how you’re enjoying these delicious brownies! .

Pumpkin Spice Buttercream Recipe: Perfect for Fall Treats!

As the crisp autumn breeze rolls in, nothing feels more comforting than the cozy flavors of fall. Pumpkin spice, the quintessential seasonal flavor, now has a new home in our Sweet Shoppe Flavored Melting Wafer collection. Perfect for all your fall-inspired baked goods, these melting wafers will elevate your seasonal baking with their rich, aromatic pumpkin spice notes. Whether you’re looking to make delicious pumpkin spice truffles, dip apple slices for a tasty snack, or create intricate molded treats, these melting wafers are your new go-to ingredient for all your fall baking needs.


Take your autumn treats to the next level with this creamy, dreamy Pumpkin Spice Buttercream recipe. It’s perfect for frosting cupcakes, cakes, or adding a delightful layer to cookies. 


Here’s how to make it:


Pumpkin Spice Buttercream Recipe

Ingredients:

 • 6 ounces (170g) Sweet Shoppe Pumpkin Spice Flavored Melting Wafers

 • 1 cup (16 Tbsp; 226g) unsalted butter, softened to room temperature

 • 2 cups (240g) confectioners sugar

 • 1 teaspoon pure vanilla extract

 • 1/8 teaspoon salt

Instructions:

  1. Melt the Wafers: In a microwave-safe bowl, melt the Sweet Shoppe Pumpkin Spice Melting Wafers. Heat in 30-second increments, stirring after each session. Once nearly melted, reduce the time to 20-second intervals until completely smooth. Let the melted wafers cool to room temperature.
  2. Cream the Butter: In a medium bowl, using a handheld or stand mixer fitted with a paddle attachment, beat the softened butter on medium speed for about 1 minute until creamy.
  3. Combine Ingredients: Switch the mixer to low speed & gradually add the confectioners’ sugar. Mix until fully combined. Stir the cooled Pumpkin Spice Melting Wafers until smooth, then add them to the butter & sugar mixture. Beat on medium speed for 2 minutes until well combined.
  4. Add Final Touches: Add the vanilla extract & salt, & beat for an additional minute. Taste the frosting. If it’s too thick, add 1 more tablespoon of heavy cream or milk. Adjust salt to taste if needed.
  5. This recipe will make enough frosting to cover 12 cupcakes, a 2-layer 8-inch cake, or a thin layer on a 9x13-inch quarter sheet cake. For a 2-layer cake, you can increase the recipe by 1.5 times.


Check out our youtube video HERE for the full recipe!


Get Creative with Your Fall Treats

From cupcakes to cookies, to cakes & candies, our Pumpkin Spice Melting Wafers will infuse all your treats with the delightful essence of autumn. Easy to melt, smooth to work with, & rich in flavor, they’re the perfect addition to your fall baking pantry. 


So what are you waiting for? Stock up on our Sweet Shoppe Pumpkin Spice Melting Wafers & start creating some unforgettable fall memories with your sweet treats! Don’t forget to share your Pumpkin Spice Treats with us in our facebook group: Stover’s Confection Connection.

RECIPE: Chocolate Cupcakes with Salted Caramel Ganache


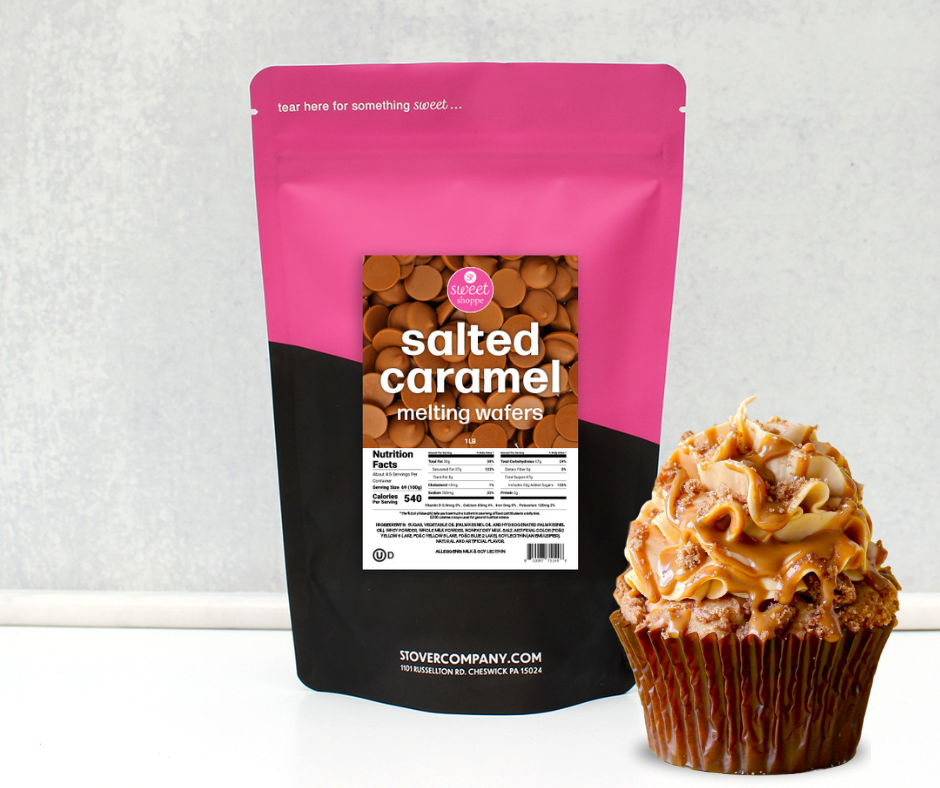
Indulge in the ultimate chocolate & caramel lover's dream with this decadent Chocolate Cupcake recipe topped with a luscious Salted Caramel Ganache! We’ll be making the ganache from scratch using our our *NEW* Sweet Shoppe Salted Caramel Melting Wafers!

Moist chocolate cake topped with a decadent salted caramel ganache to create a dessert that's sure to impress! 

Let's dive into the recipe & create this chocolate masterpiece!

Ingredients:

For the Chocolate Cupcakes:

For the Salted Caramel Ganache:

Instructions:

For the Chocolate Cupcakes:

  1. Preheat your oven to 350°F (175°C). Prepare a cupcake pan with liners.
  2. In a large mixing bowl, sift together the flour, sugar, cocoa powder, baking powder, baking soda, & salt.
  3. Add the eggs, milk, vegetable oil, & vanilla extract to the dry ingredients. Mix until well combined.
  4. Gradually add the hot water to the batter, stirring until smooth. The batter will be thin, but that's okay.
  5. Divide the batter evenly between the prepared cupcake liners, filling them halfway.
  6. Bake in the preheated oven for18-20 minutes, or until a toothpick inserted into the center comes out clean.
  7. Remove the pans from the oven & let the cupcakes cool completely.

For the Salted Caramel Ganache:

  1. In a heatproof bowl, combine the Sweet Shoppe Salted Caramel Melting Wafers & heavy cream.
  2. Microwave the mixture in 30-second intervals, stirring between each interval, until the wafers are completely melted & the ganache is smooth. About 2 or 3 total intervals.
  3. Let the ganache cool for a few minutes to thicken slightly.
  4. Take ½ of the ganache & transfer it to a glass bowl & refrigerate for 10 minutes to make a thicker consistency for the filling. 

Decorate:

  1. Once the cupcakes have cooled, it's time to decorate them!
  2. Grab your thicker caramel ganache & using a piping bag, top each cupake with firm caramel ganache as if it were frosting.
  3. With your thinner ganache, pour it in a squeeze bottle or use a spoon, create drops or drizzle on the top edge of your piped cupcakes.
  4. If desired, sprinkle sea salt flakes or our eleven o’one Salted Caramel Flakes over the caramel ganache for an extra burst of flavor.
  5. Unwrap your Salted Caramel Chocolate Cupcakes, & enjoy every rich & decadent bite!

Perfect for special occasions or simply satisfying your chocolate cravings, these cupcakes  are sure to be showstoppers!

Lemon Blueberry Easter Muffins

Easter is coming early this year! Mark your calendars for this Sundary, March 31st. 

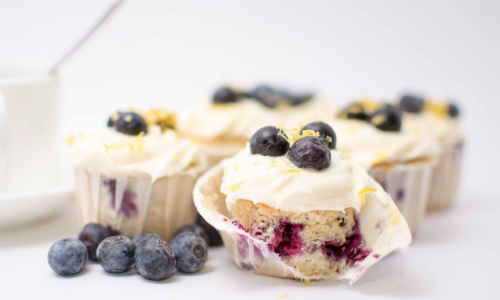
What better way to celebrate than with a batch of Lemon Blueberry Easter Cupcakes? These sweet treats are the epitome of Spring baking bursting fresh flavors!

Gather your ingredients, preheat your oven, & let's get baking!


Ingredients:

For the Cupcakes:

Filling:

Frosting:

Instructions:

  1. Preheat your oven to 350°F  & line a muffin tin with muffin liners.
  2. In a medium bowl, whisk together the flour, baking powder, baking soda, & salt. Set aside.
  3. In a large bowl, cream together the softened butter & granulated sugar until light & fluffy. Add the eggs one at a time, beating well after each addition. Stir in the vanilla extract & lemon zest.
  4. Gradually add the dry ingredients to the wet ingredients, alternating with buttermilk. Begin & end with the dry ingredients, mixing just until combined.
  5. Fill each muffin liner about two-thirds full with the muffin batter.
  6. If using homemade filling: Spoon a small amount of the blueberry compote onto the center of each cupcake, gently pressing it into the batter. If using Henry & Henry Blueberry Redipak, skip this step.
  7. Bake the cupcakes for 18-20 minutes or until a toothpick inserted into the center comes out clean.
  8. While the cupcakes cool, prepare the lemon cream cheese frosting. In a large bowl, whip the Brill Cream Cheese Icing & combine lemon juice, lemon zest, & vanilla extract. Beat mixture until creamy & well combined.
  9. If using Henry & Henry Blueberry filling: Once the cupcakes are completely cooled, cut a small hole on the top of the cupcakes and pipe or spoon a little of the Henry & henry Blueberry filling and replace the piece you cut out on top.
  10. Continue by frosting your easter cupcakes with the lemon cream cheese frosting. 

PRO TIP: You can get creative with your decorating, adding a sprinkle of lemon zest or a few fresh blueberries on top.
Want to make these complete from scratch? Make your own Blueberry Filling & Lemon Cream Cheese Frosting!

For the Blueberry Compote:

  • 1 cup fresh blueberries
  • 2 tablespoons granulated sugar
  • 1 tablespoon lemon juice

In a small saucepan, combine the blueberries, sugar, & lemon juice for the compote. Cook over medium heat until the blueberries burst & the mixture thickens slightly. Remove from heat & let cool.

For the Lemon Cream Cheese Frosting:

  • 8 oz cream cheese, softened
  • ½ cup unsalted butter, softened
  • 4 cups powdered sugar
  • 1 tablespoon lemon juice
  • 1 teaspoon lemon zest
  • 1 teaspoon vanilla extract

In a large bowl, whip together the softened cream cheese & butter until smooth. Add the powdered sugar, lemon juice, lemon zest, & vanilla extract. Beat until creamy & well combined.

The combination of zesty lemon, sweet blueberries, & creamy frosting creates a heavenly treat that will have everyone reaching for seconds. 

These Easter Cupcakes are sure to become a new holiday tradition in your home. 

Happy baking!

Pillsbury Baker's Plus Cake Mix Recipe for Smaller Batches

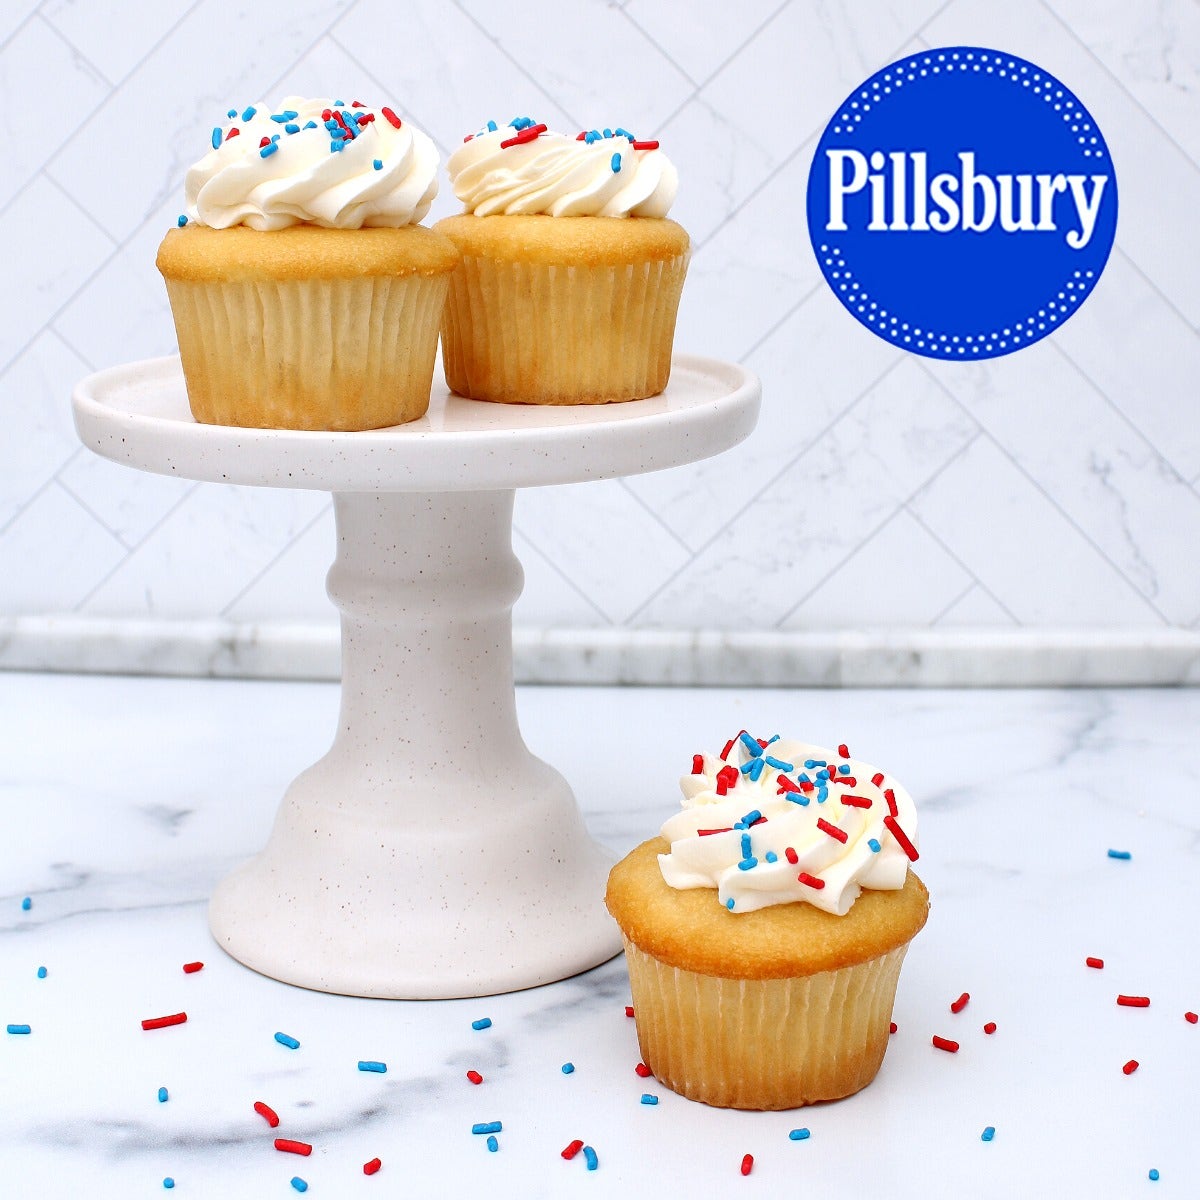
Whether you're a home baker or managing a bustling commercial kitchen, let Pillsbury Baker's Plus Cake Mix be your secret ingredient to achieving cake perfection. This 50lb bag is not your average grocery store cake mix; it's a versatile base that yields a softer cake, making Baker’s Plus Cake Mix the ideal base for creating a variety of flavors. 

At Stover & Company we are proud to be a Pillsbury partner! Choose from the following  cake mix flavors for your next baked cake!

Today, we're sharing a scaled-down recipe for those who want to whip up a smaller batch of cake mix without sacrificing the amazing results Pillsbury has to offer. 

Ingredients:

  • 3 lbs Pillsbury Baker's Plus Cake Mix
  • 12 oz water
  • 10 oz water
  • 10 oz water
  • 6 oz vegetable oil (or substitute with melted butter or sour cream if making cake pops)


Instructions:

  1. Preheat your oven to 350ºF.
  2. Weigh out 3 lbs of Pillsbury Baker's Plus Cake Mix & combine it with 12 oz of water in your mixer.

    Mix on low for 3 minutes, ensuring a smooth & well-incorporated batter.
  3. Add 10 oz of water & continue mixing on low for 1 minute.
  4. Scrape down the sides of the bowl to ensure even mixing.

    Increase the mixer speed to medium & blend for an additional 2 minutes.
  5. Introduce 10 oz of water & 6 oz of vegetable oil (or your chosen substitute) to the mix.

    Mix on low speed until all ingredients are combined.
  6. Scrape down the sides once more.

    Increase the mixer speed to medium & continue blending for 2 minutes, to achieve a perfectly textured batter.
  7. Pour your batter into aluminum cake pans (ideally 9x13)
  8. Bake for approximately 50 minutes. Ovens & pans may vary – adjust time & temperature accordingly.


PRO TIPS:

  1. Want to enhance the flavor of your white cake? Add 6-9 tsp of your favorite extract to the initial 12 oz of water before mixing.
  2. If you are trying out our small batch recipe, take the time to portion out the whole 50lb Pillsbury bag into freezer ziplock bags. Not only will you ensure the freshness of your cake mix, but you will thank yourself later for prepping ahead of time!

Whether you're keeping it classic or experimenting with exciting flavors, this recipe guarantees a moist & delicious result every time. If you give this recipe a try, share your creations in our Facebook Community group: Stover’s Confection Connection. 

Happy baking!


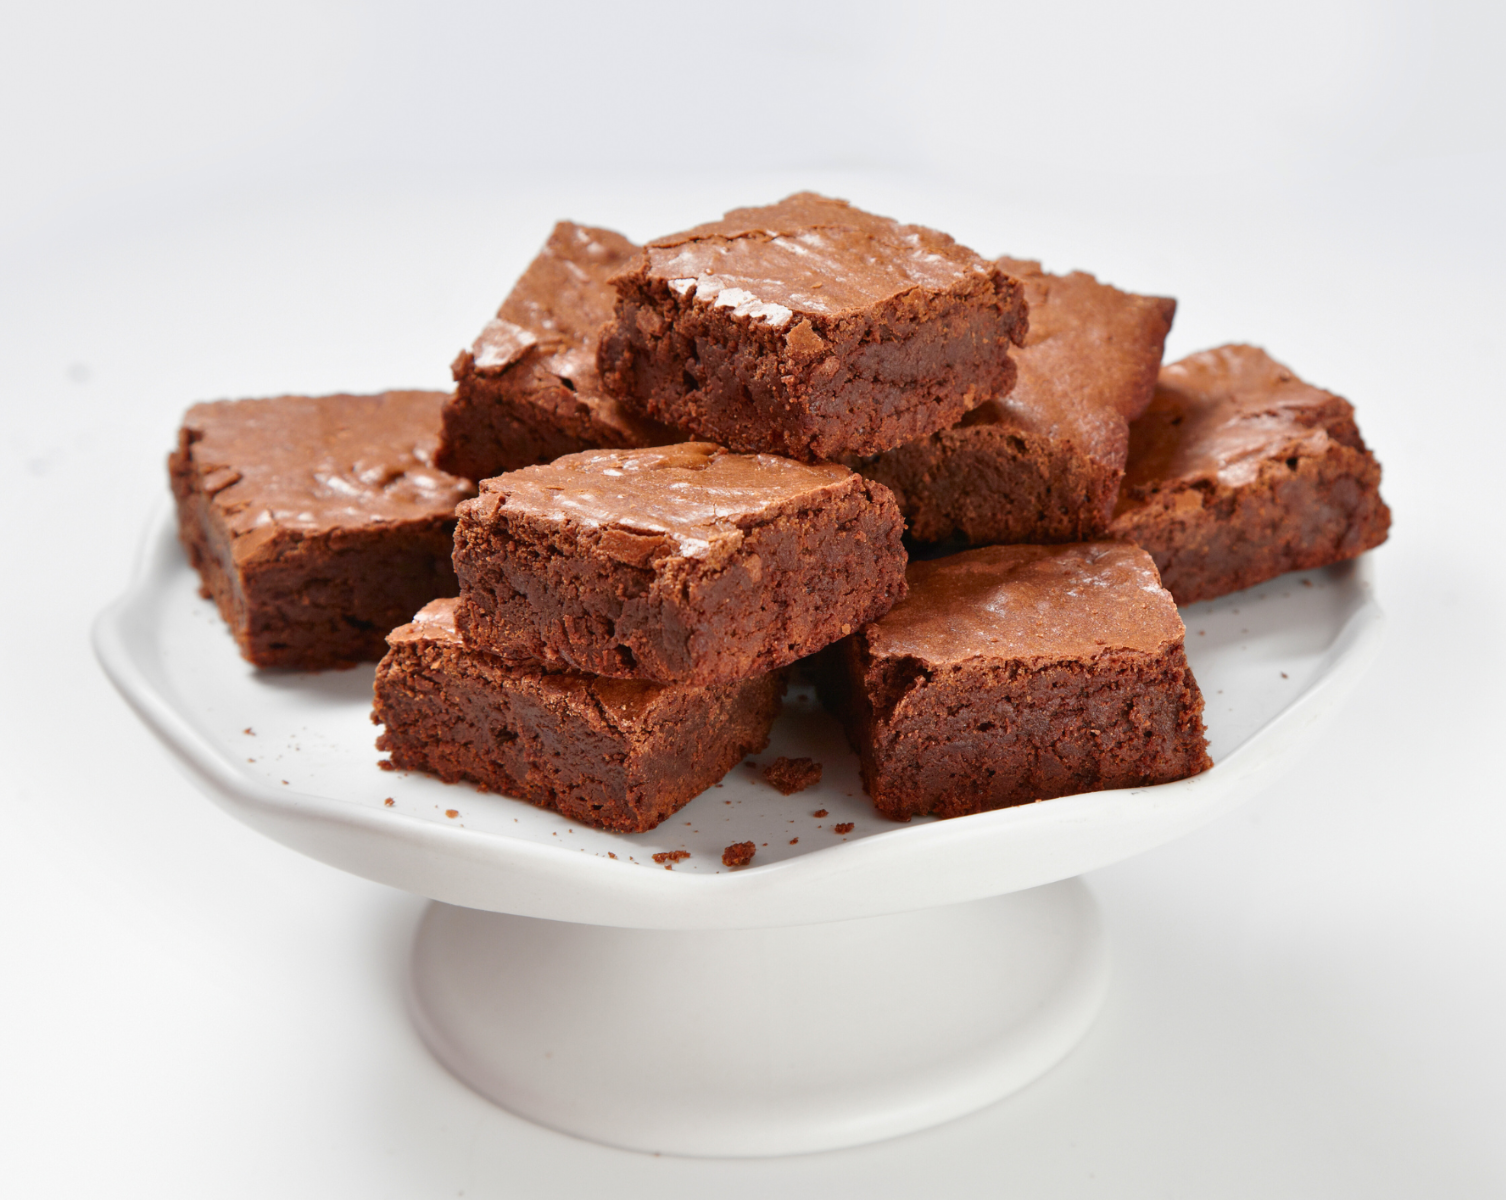
The Perfect Recipe to Celebrate National Brownie Day

Brownie lovers, rejoice! December 8th is National Brownie Day! What better way to celebrate this sweet day than by whipping up a batch of irresistibly fudgy brownies using our imported couverture chocolate from our Eleven o’one line.


When it comes to baking the perfect brownie, the quality of the chocolate is non-negotiable. Enter Eleven o’one Couverture Chocolate, our specially curated line of premium European chocolate known for its rich flavor & smooth texture. This line offers five varieties of Belgian Chocolate offering a little something for everyone. 


For this delicious recipe, we’re opting for our Eleven o’one Sixty Dark Couverture Chocolate to give our brownies a rich, decadent, dark chocolate flavor with its 60% cocoa content. 


For those eager to celebrate National Brownie Day with us, let’s dig into this foolproof brownie recipe!

Brownie Recipe:


Tools:

  • Hand or stand mixer
  • Microwavable bowl
  • Silicone Spatulas
  • 8x8 or 9x13 baking pan (8x8 pan will give you a thicker brownie)
  • Parchment paper

Ingredients:

Instructions:


  1. Preheat your oven to 350ºF. Grease & line a baking pan with parchment paper.
  2. In a microwave safe bowl, melt your Eleven o’one Sixty Dark Couverture Chocolate & butter together in 30 second intervals, stirring until smooth. Allow the mixture to cool slightly, but not harden.
  3. In a separate bowl, whisk together your sugar & eggs until well combined. Add the vanilla extract & mix well.
  4. Gently stir the melted chocolate mixture into the egg-sugar mixture until fully incorporated.
  5. Sift the flour & salt & fold them in until just combined. 
    PRO TIP: Be careful not to overmix.
  6. If desired, add chopped nuts, chocolate chips or our Eleven o’one Salted Caramel Flakes into your batter for extra texture & flavor.
  7. Pour the brownie batter into your prepared baking pan & spread evenly.
  8. Bake for 25-30 minutes. To check if they’re ready, insert a toothpick into the center of the pan & if the toothpick comes out with a few moist crumbs attached, they are ready!
    PRO TIP: Given the irresistible gooey consistency of brownies, your toothpick will not come out completely clean, so be sure not to over bake!
  9. Allow your brownies to fully cool before cutting to enjoy! 

Pair these brownies with a scoop of vanilla ice cream or a drizzle of caramel sauce for an extra special treat! You can also top these off with a delicious ganache made with the same delectable couverture chocolate! 

Let us know how you like to brownie in our Facebook Group: Stover’s Confection Connection. 

Pro Tips:

  1. Explore our range of Eleven o’one Couverture Chocolates from Thirty Three White to Seventy Dark. Each of these products will result in a different flavor profile!
  2. Try our Sweet Shoppe Chocolate Chips mixed into this recipe! We have 2 sizes to choose from: Regular (1M) & Mini (4M)!
  3. Eleven o’one Salted Caramel Flakes would be the ideal pairing in this recipe. These little golden nuggets will melt in place & then slightly harden once cooled, resulting in chewy caramel bits all throughout your brownies! Want to learn more about them, check out this blog post

How to Create Christmas Hot Cocoa Bombs

We are feeling the holiday spirit at Stover & Company! What better way to cozy up than with a warm cup of hot chocolate made from a rich, chocolatey hot cocoa bomb! 


It’s no secret that hot cocoa bombs have taken over the holiday season year after year! Whether you’re a seasoned professional who creates cocoa bombs in their sleep, or you’re a beginner looking for step by step instructions to make your own, we’re here to walk you through the process & share some pro-tips.


Watch Alicia, our Brand & PR Specialist, whip up some adorable Christmas Tree Hot Cocoa Bombs with ease thanks to our Sweet Shoppe Forest Green Coating Wafers!


Ready to make your own hot cocoa bombs? 


Here’s what you’ll need:

Instructions:


  1. If you are using a silicone candy mold, we suggest cutting your silicone mold into individual half spheres as it’s easier to coat the inside of the sphere mold if they are separated. 
  2. Make sure your candy molds are clean & dry. Even the smallest amount of water or moisture can ruin your chocolate or compounds. Any dry water spots on your candy mold can make your hot cocoa bombs dull.

    If you’re using a silicone mold: Wash candy mold with warm soapy water & let fully dry. Put your candy molds in a preheated oven to 200ºF for a few minutes to ensure all moisture is removed to help eliminate any water spots. Make sure you let cool before making your hot cocoa bombs.  

    If you are using a 3 part mold: Hand wash & dry all three pieces of your candy mold. Once dry, polish your candy molds using a high proof alcohol & a paper towel to get a nice shiny finish.
    PRO TIP: NEVER put your candy molds in the dishwasher.
  3. Melt your Sweet Shoppe Forest Green Coating Wafers. Check out this video on how Alicia melts hers or check out this handy blog post.

    If using a silicone mold: pour a small amount of melted Sweet Shoppe Forest Green Coating Compound into your candy mold. Use your spatula to spread the compound coating until the candy mold is fully covered. Swirl your coating around if needed to get even coverage. Let set then add a second coat.

    If using a 3 part mold: pour a small amount of melted Sweet Shoppe Forest Green Compound in your candy mold to the designated fill line. Place the insert portion on top of the compound then add the top side of the mold, pressing down until your compound chocolate has evenly spread throughout the mold.
    PRO TIP: Make sure to clean the edges of your mold with your spatula between coats to ensure your edges are set nice & flat.
  4. Pop your candy molds in the freezer for about 1-2 minutes to help the chocolate set quickly & ensure your chocolate pieces release properly.
    PRO TIP:  It’s important that your candy molds are not cold when adding chocolate. If you plan to reuse your candy mold to create additional cocoa bombs, we recommend warming your candy molds to room temperature prior to use.
  5. While your sphere candy molds are chilling in the freezer, it’s time to create your chocolatey decorations! Grab the rest of your melted Sweet Shoppe Forest Green Compound Coating & pour into a Christmas Tree candy mold, or any candy mold of your choice!
  6. Pop your decoration candy molds into the freezer for about 1-2 minutes to help your decorations set quickly.
  7. While your chocolate decorations harden, remove your sphere molds from the freezer & gently unmold your chocolate pieces.

    PRO TIP: gently pull your silicone molds away from the sphere starting around the edges first. Once the edges have been released, put your hand inside of the sphere for some leverage & gently peel the candy mold back. This method should result in a shiny half sphere. 
  8. Heat up an empty ceramic plate in the microwave for about 2 minutes.
  9. Quickly & gently, place half of your chocolate domes (one by one) with the edges face down, on your warm plate. This process will slightly melt any uneven edges, resulting in nice, flat & even edges that will be easier to adhere together. 
  10. Add approximately 2 TBSP of hot cocoa mix into one half of each sphere & top with marshmallows, sprinkles, edible glitter or whatever fun surprises you want to add inside your hot cocoa bomb! 

    PRO TIP: Place hot cocoa bomb shells in cupcake liners before assembling to eliminate clean up. 

  11.  Using the same warm plate, smooth out the edges to the remaining domes one by one, & while they are melted, adhere the top of the hot chocolate bomb to the filled side like a lid. 

  12. Unmold your hardened Christmas Tree decorations & use some melted compound to adhere these chocolate creations to the top of your hot cocoa bombs.

  13. Use your favorite brand of sprinkles, or even more chocolate, to decorate your tree or finish off your minimalistic look with a simple drizzle.

  14. Let hot cocoa bombs fully harden before packaging. 

TIPS & TRICKS: 

  • Three part candy molds tend to be easier to work with + they require less chocolate than with silicone molds.
  • There are many different shapes & sizes for hot cocoa bomb molds, so be creative. Standard size is usually 70mm or 2.5 - 3 inches.To avoid fingerprints on your hot cocoa
  • bombs, use cotton gloves when handling your chocolate pieces.
  • Sweet Shoppe Compound Coating Wafers are perfect for adding a splash of color to your hot cocoa bombs.
  • If you are looking for a rich flavor profile & thin consistency without having to temper, we suggest using our Eleven o’one Deluxe European Compound Coatings
  • Want to skip the coating wafers & use real chocolate? We recommend trying our Eleven o’one European Couverture Chocolates. 
    If you’re using real couverture chocolate, there is no need to add hot cocoa mix. You can simply fill the spheres with marshmallows & goodies, letting the chocolate speak for itself.

We love seeing your creations! Be sure to tag us in your treat photos or videos or post them in our Facebook Group: Stover’s Confection Connection


Pumpkin Chocolate Chip Cookies

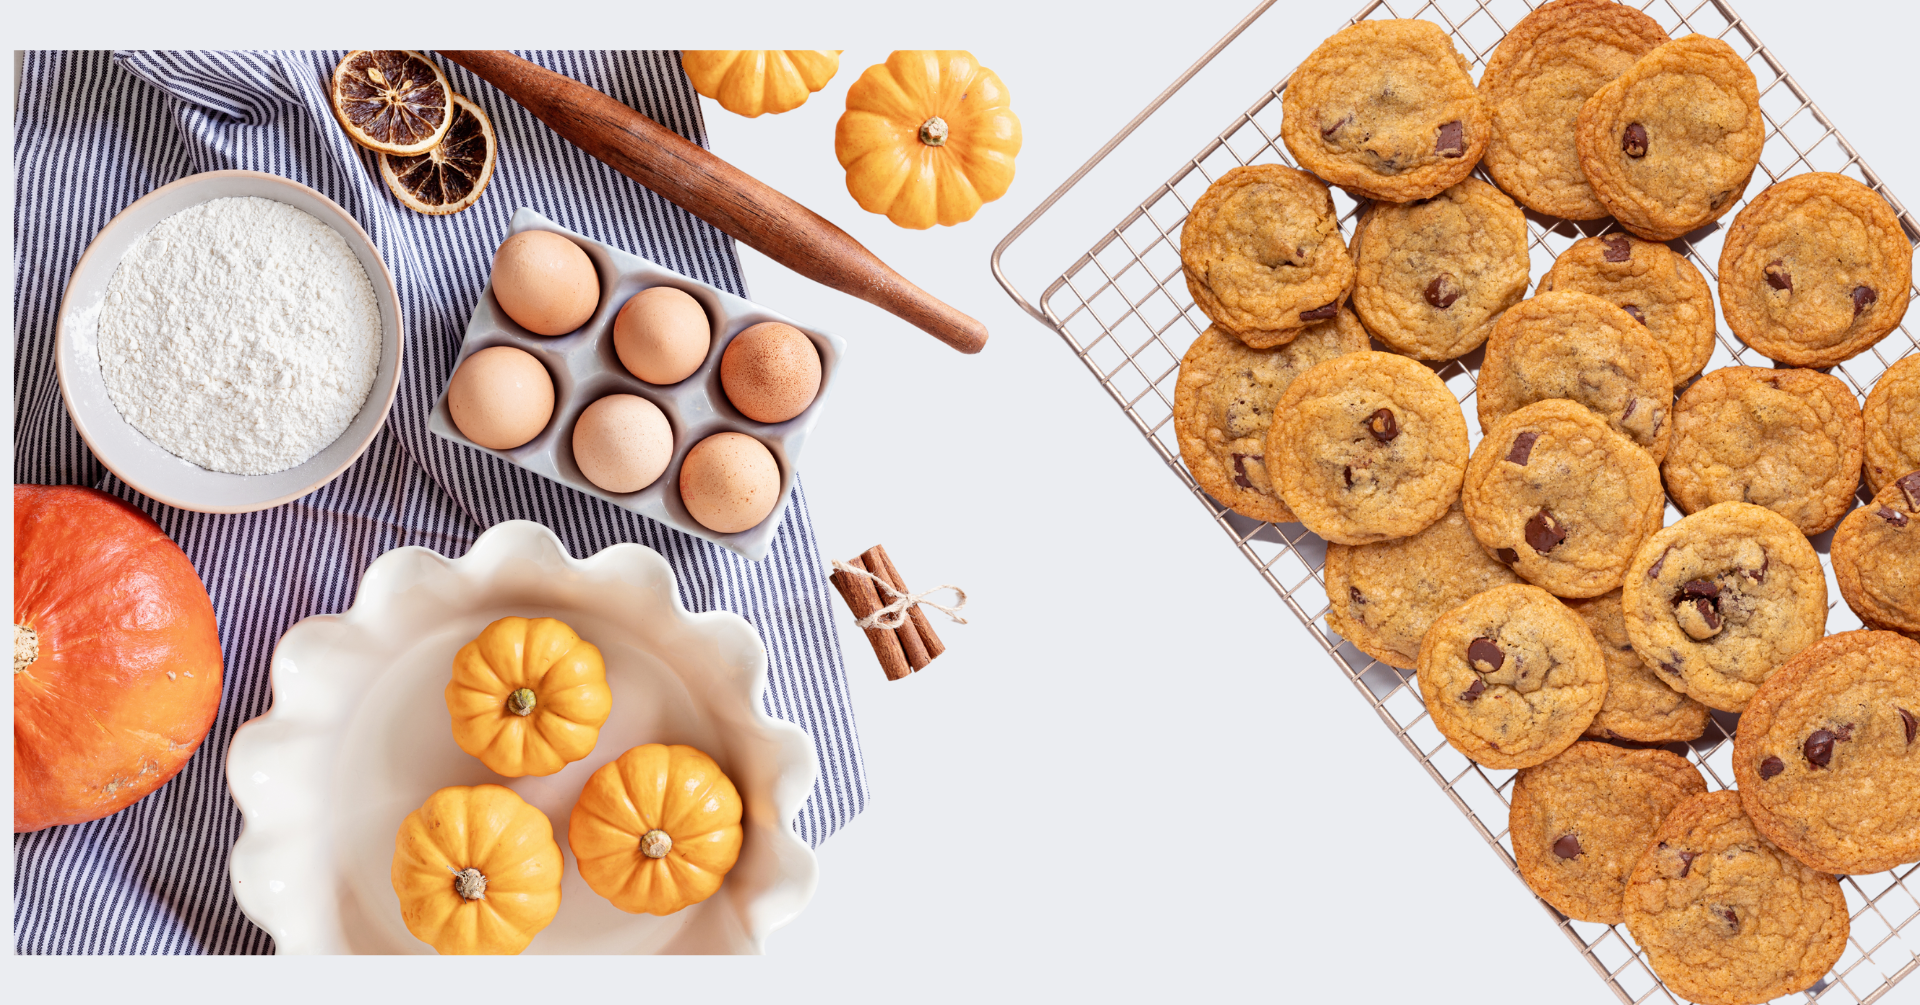
At Stover & Company, we love a recipe that can be adapted to different flavor profiles! Today we’re going to take our original recipe for the best chocolate chip cookies ever & give them a seasonal twist. 


Introducing Pumpkin Chocolate Chip Cookies! Let’s get started! 


Tools:

  • bowls
  • hand whisk
  • electric or stand mixer
  • spatulas
  • baking sheet
  • parchment paper

Ingredients:

Instructions:

  1. In a medium bowl, use a hand whisk to combine flour, baking soda, cornstarch, salt & spices. Set the bowl aside.
  2. In a separate bowl, with an electric or stand mixer, whisk together butter & both sugars on medium-high for 1 minute.
  3. Add eggs, vanilla & Seneca Pumpkin Puree to mixing bowl & whisk until fully incorporated.
  4. On a low speed, slowly add in the remaining dry ingredients & mix until well combined.
  5. Using a spatula, fold in Sweet Shoppe Chocolate Chips.
  6. Cover your cookie dough & refrigerate for 30-60 minutes.
  7. Remove cookie dough from the refrigerator & preheat your oven to 325°F.
  8. Scoop ¼ cup of cookie dough & roll into individual dough balls. Continue until you run out of cookie dough. (You should have roughly 15-18 dough balls)
  9. Before placing the cookie dough on your baking sheet, tear each dough ball in half then press the two halfs back together to create a slightly messy look.
  10. Place dough balls on parchment paper, leaving enough room between for the dough to spread.
  11. Bake cookies for 12-15 minutes, at 350°F, rotating the baking sheet halfway through. When ready, your chocolate chip cookies should have golden edges & a soft center. 
    PRO TIP: Your Pumpkin Chocolate Chip Cookies might look slightly underdone. This is normal because of the pumpkin puree. Do not continue baking or they might burn!!
  12. Let cool & enjoy the very best cookies you’ve ever had.


Makes 10-15 extra large cookies

Share your fall baking with us in our Facebook group: Confection Connection!


Happy baking!


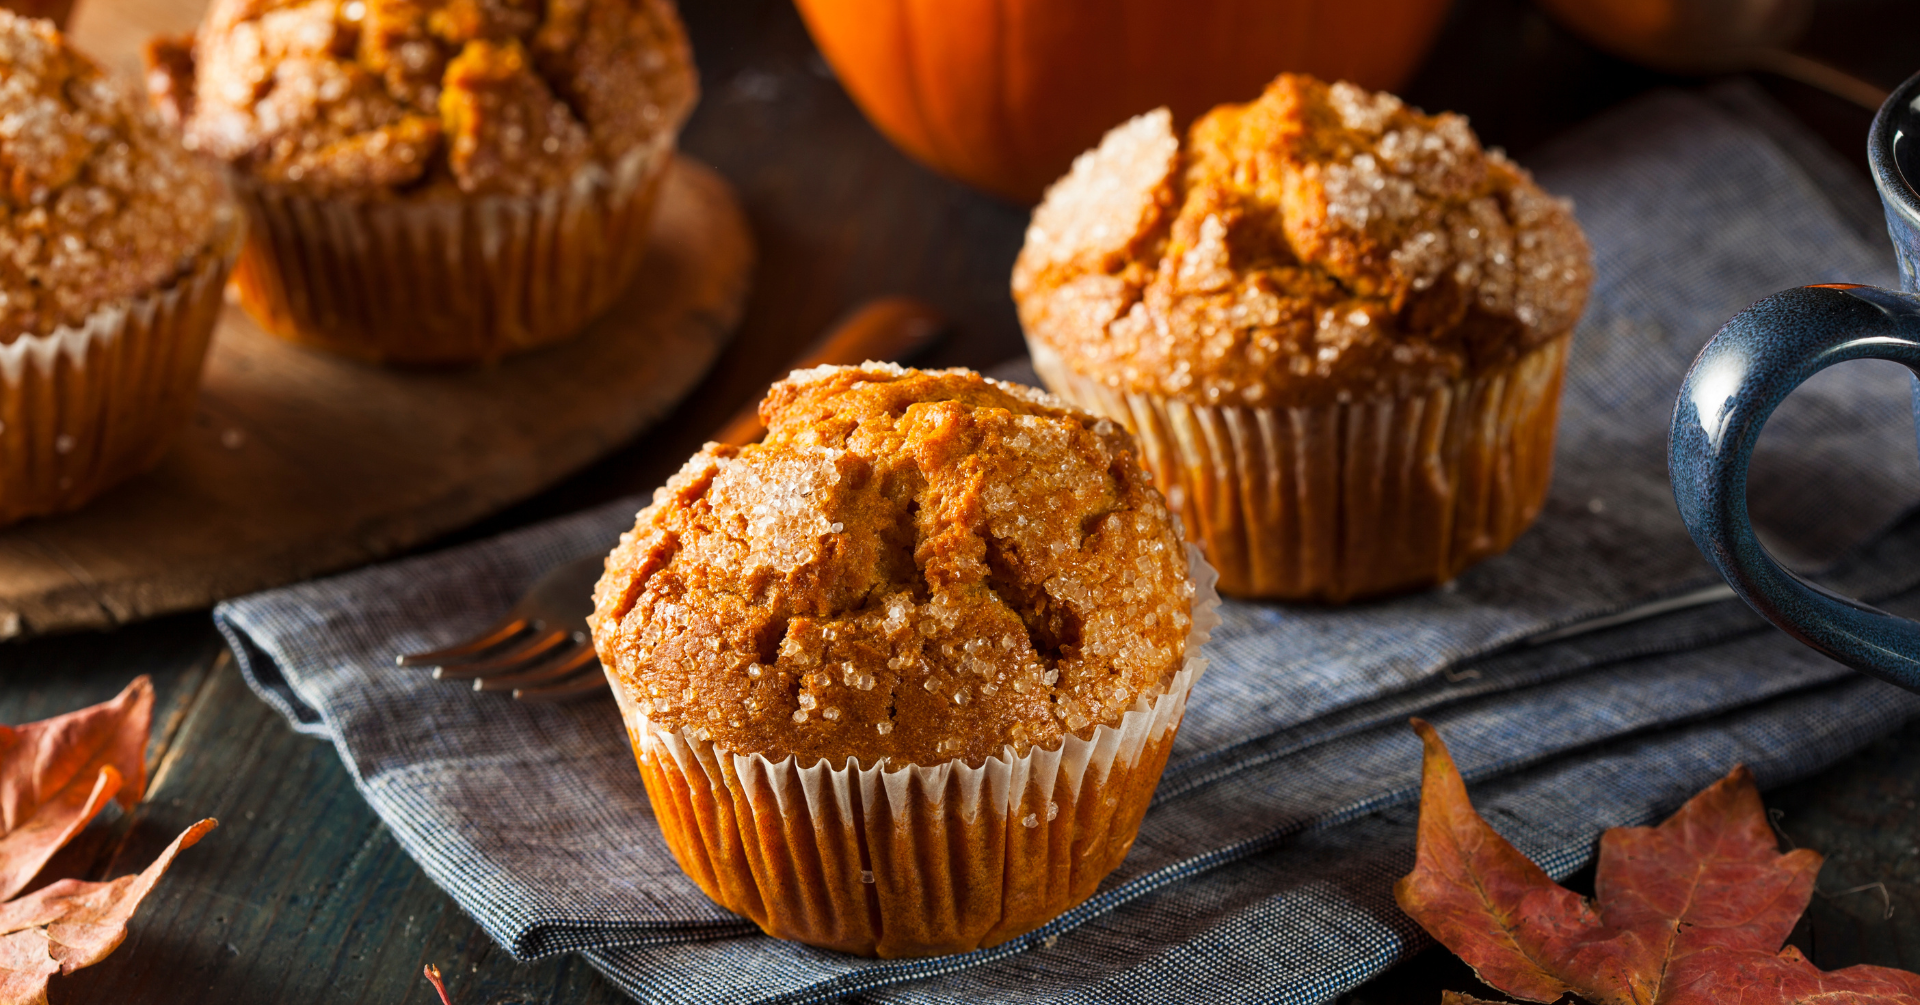
Pumpkin Spice Muffins Recipe


Fall is here & that means it’s pumpkin spice season! 


While fresh pumpkins are fantastic, sometimes we’re in a pinch for time & convenience. That’s where canned pumpkin puree comes to the rescue. Seneca Canned Pumpkin is a versatile ingredient that can be used to whip up delicious recipes without the hassle of roasting & pureeing a fresh pumpkin.


Grab your apron & let’s get started!


Pumpkin Spice Muffins Using Seneca Canned Pumpkin


Tools:

  • Bowls
  • Whisk
  • Silicone Spatulas
  • Muffin Tin
  • Muffin Liners
  • Wire Rack

Ingredients:

Instructions:

  1. Preheat your oven to 350º F & line a muffin tin with paper liners.
  2. In a mixing bowl, whisk together your Seneca canned pumpkin puree, sugars, vegetable oil, eggs & vanilla extract until well combined.
  3. In a separate bowl, sift together the flour, baking powder, baking soda, salt & pumpkin pie spice.
  4. Gradually add the dry ingredients to the wet ingredients, mixing until lightly combined.
    *PRO TIP: Be careful not to over mix!
  5. Divide the batter evenly among the muffin cups, filling each about ⅔ full.
  6. Bake for 20-25 minutes or until a toothpick inserted into the center of a muffin comes out clean.
  7. Allow the muffins to cool in the pan for a few minutes before transferring to a wire rack to cool completely. 

Makes 12 large muffins.


Embrace the flavors of fall & stock up on Seneca Pumpkin Puree today!


Share your finished treats in our Facebook group: Confection Connection! 


Happy baking!


connect with us